Result: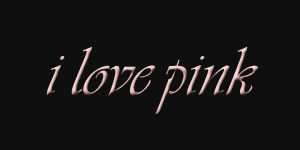
1. Open a new file in Photoshop, choosing your background color and dimensions.

2. Create a new layer.

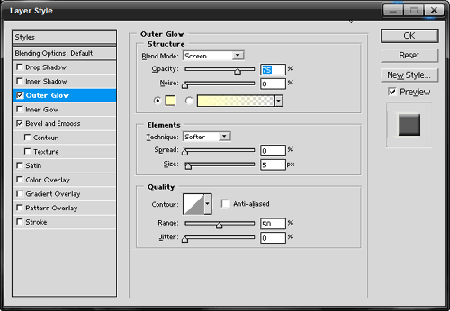
3. Go to Layer>Layer Style>Bevel and Emboss. Depth should be 100%, size 5px.

Click again Layer>Layer Style>Outer Glow. Opacity should be 75%, technique should be Softer, size 5px.
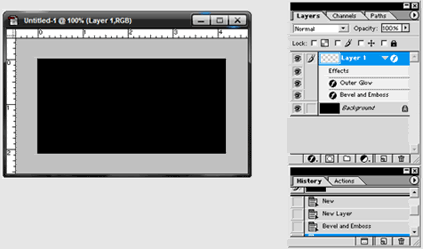
Click OK and your layer palette should now have 2 layers like this:
4. Click the Text icon, and type in the text that you want.
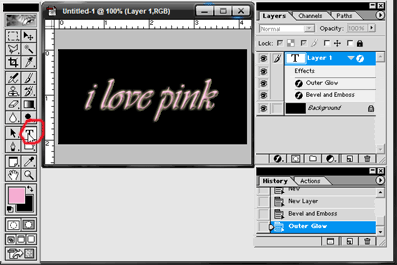
5. Drag the layer you just created to the Copy icon.
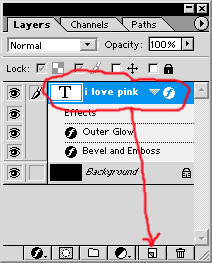
Now you have 2 layers that are exactly alike. Rename the new layer as Glow.

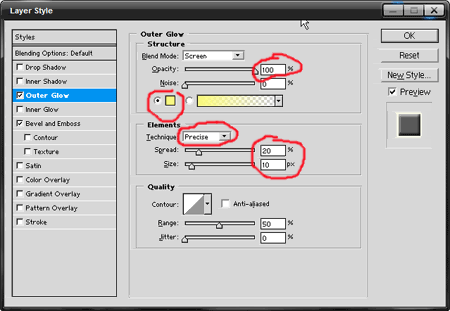
6. While on the Glow layer, go again to Layer>Layer Style>Outer Glow. Change Opacity to 100%, technique: Precise, spread: 20%, size: 10px, and the color to a brighter yellow.
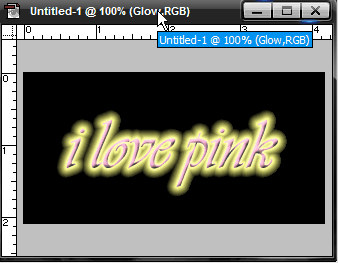
7. Now you should have 3 layers, the background, the I-love-pink layer, and the Glow layer. Your text should look like this now:
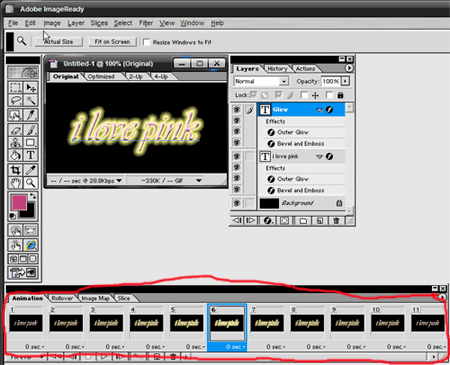
8. We can now go to File>Jump to ImageReady. The animation palette should appear on screen.
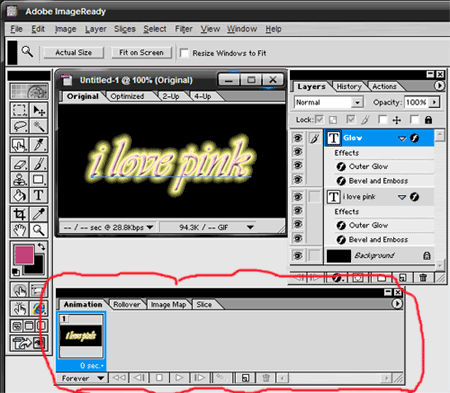
9. For the first frame, make sure the eye is only on the background and I-love-pink layer. Click twice on the Copy icon on the animation palette.
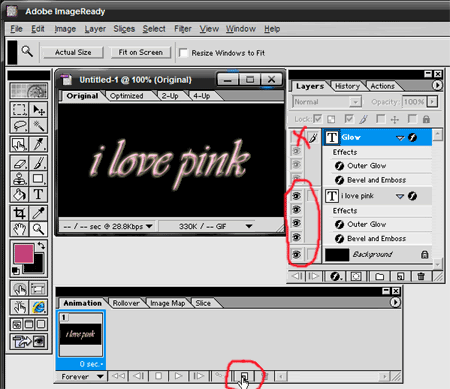
10. Now you have 3 frames on the animation palette. On the second frame, make sure that the eye is on all the layers.
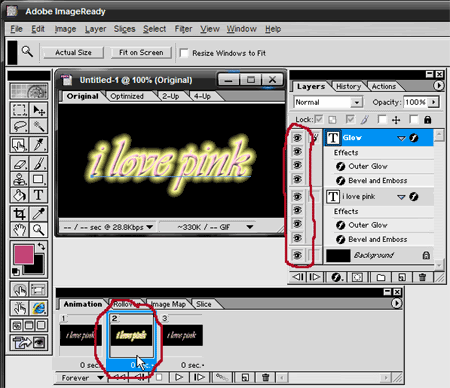
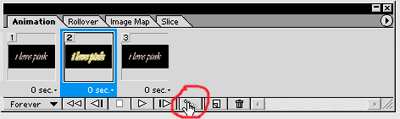
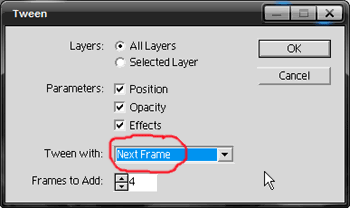
11. Click on the Tween icon,
choosing All Layers, Tween with Previous Frame, and add 4 frames.
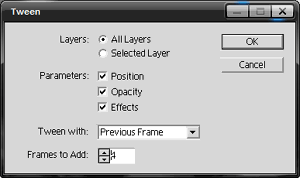
12. You should now have 7 frames in your animation palette. Click on frame 6, and click on the Tween icon again,
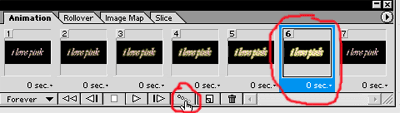
this time choose Tween with Next frame.
You should now have 11 frames.
You can delete frame 11 now, since it is only a duplicate of frame 1, and we only used it to make tweening easier. That leaves you with 10 frames in total.
13. We will now change the duration of certain frames. For frame 6, choose 1 sec, and the rest of the frames should remain as No Delay.
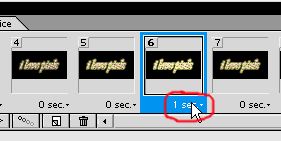
14. Make sure that your Looping Option is set to Forever.

15. We can now save our gif. Go to File>Save Optimized As> Save as file type .gif

16. Click on the Play Icon and watch your text glow like this!